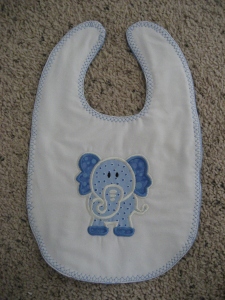
Ok so here it goes. With prompting from family, I am sharing my first tutorial. This week I decided to take a lesson from niece Erika on making baby bibs, which she posted on her sister’s web site Hungie Gungie. Erika does not like to sew but was inspired this summer to make bibs and became the bib making queen. I decided to make the same style bib and take it one step further by adding an embroidered applique!
I found the bib pattern on Juicy Bits and the cutest little elephant applique download from Hang to Dry and I was good to go. Hang to Dry periodically offers free downloads – and the elephant was free the day I visited! (Lucky me!)
To begin, sew out a test sample of your embroidery. I always use enough material for my test samples just in case it comes out “great” I will be able to use it in a final project. My first attempt is a blue elephant on plain white fabric. (Always remember – embroidery machines are “color blind”. You can change all the thread colors amd material colors for applique to your own desires.)
Also by sewing a test sample, you will often find there are steps you can eliminate or make easier. As an example, Hang to Dry has you switching threads from black to white between the “layout” stitch and the “tack-down” stitch. I found it much quicker to just use white/cream thread for both steps and not bother re-threading the machine. Hopefully the next pictures will give you an idea what I mean.
Here in picture #2 I have my chosen fabric hooped with a standard tear-away stabilizer (I used Inspria stabilizer for this). My embroidery machine is the Baby Lock Ellisimo (you will come to know I am a Baby Lock Snob) I just love their machines.
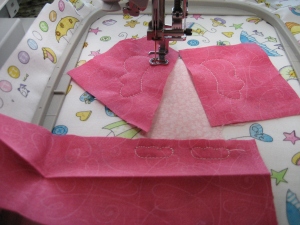
Now if you look real close in pic #2 you can see the outline of our elephant. This is the drawback for not using the black thread which would show better for this picture. But not a problem when you are at your own machine. The next step is to place your chosen applique fabric, large enough to cover all the outline stitches.
In picture #3 the machine tacks-down the material and you trim away the excess fabric, see picture #4 I have clipped very close to the stitches BUT do not cut the stitches. Clipping will be more clearly demonstrated in pictures 6 & 7. PLEASE REMEMBER, ALWAYS leave your project in the hoop when trimming. NEVER UNHOOP until your project is completed.
Next, picture #5, add the contrast fabric for the feet and ears and allow the machine to tack these down.
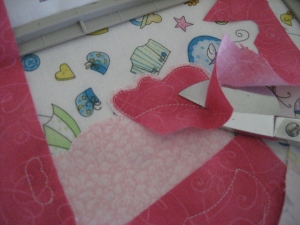
Now trim away the excess fabric. Here in pictures 6 & 7 I am using Gingher Applique sissors. The large curved side allows extra control to keep me from clipping those tack down stitches.
Finally this is taking shape and looking more like an elephant. Now I let Ellisimo do his thing and sew out all the satin stitches. I just have to be onhand to change the thread.
I will not re-do the making of the bib. As I said in the beginning, my niece Erika does a great job with her tutorial on Hungie Gungie. I will say I used pink flannel for the back of this bib and blue flannel on the first bib. And I used fleece for the middle for “structure” as Erika says. I just like the looks better with a filler. I then used a decorative stitch around the edge to add a little more flare. I hope you enjoy reading this as much as I enjoyed sharing it with you. Happy Sewing!!!


